EBKEN10010: How I use screen for server administration.

Abstract:
1 Getting started with sceen
1.1 Installation on Debian/Ubuntu/Kubuntu
The installation on debian based systems - these are all systems using deb packages - is easy. The installation is done by the following command:
apt-get install screen
When you start screen by typing "screen" on the command line, it seems as if you just get your bash again. Before really working with it you should configure it a bit.
1.2 Configuration
My configuration, which is a bit more complex, looks like the following:
# $HOME/.screenrc
# Wim Peeters <www.lubby.org>

# Defines the time a message is displayed
# if screen is not disturbed by other activity.
msgwait 2

# Print the version and the compile date in the status line.
version

# Same as the login command except that the
# default setting for new windows is  changed.
deflogin off

# Same as the scrollback command except that
# the default setting for new windows is changed.
defscrollback 500

# If set to "on", screen will append to the "hardcopy.n"
# files created by the command "C-a h", otherwise these
# files are overwritten each time.
hardcopy_append on

# This command configures the use and emulation of the
# terminal's hardstatus line
hardstatus on

# When you  are  familiar  with  the  game "nethack",
# you  may enjoy the nethack-style messages which will
# often blur the facts a little, but are much funnier to read.
nethack on

# Select whether you want to see the copyright notice during
# startup
startup_message off

# Sets the visual bell setting for this window.
vbell off

# If you prepend the word "always" to the type (e.g.,
# "alwayslastline"), screen will use the type even if the
# terminal supports a hardstatus.

hardstatus alwayslastline "%{= dR} %-Lw%50>%{= dG}%n%f* %{= dW}%t%{= dR}%+Lw%<"

#
# Change the way screen does highlighting for text marking
# and  printing  messages.
#
# explanation about color codes:
#
# sorendition <attribute> <color>
# sorendition ab cd  //  a,c=bg  b,d=fg
#
#  ab             c&d       c&d
#  00 normal       0 black   4 blue
#  1- invert       1 red     5 magenta
#  25 bright       2 green   6 cyan
#  3- 1+2          3 brown   7 silver
#
# * attributes are cumulative, so a=3 is invert+bright
# * colors use the same codes for bg & fg colors,
#   so cd=22 all you get is green, text unreadable
#
# examples:
#  00 02 - black bg (0), green fg (2), no attributes (00)
#  20 30 - brown bg (3), black fg (0), bright bg (2) -> turns yellow
#  35 74 - silver bg (7), blue fg (4), invert, bright bg (3)
#  bright fg (5)
#
#
# Coloring:
#sorendition 10 49 # Blue on White
#sorendition 05 46 # Cyan on Blue
#sorendition 05 42 # Green on Blue
#sorendition  05 70
sorendition  25 70

# The message specified here is output
# whenever a `Power detach' was performed.
pow_detach_msg	"BYE"

# Keybindings
bind ~ activity	"activity in %n (%t) [%w:%s]~"
bind * activity	"activity in %n (%t) [%w:%s]"
bind m screen -t 'mutt' mutt
bind v screen -t 'vim' vim
bind w screen -t 'w3m' env TERM=xterm w3m -B
bind y screen -t 'mc' env PAGER=less.sh mc -c
bind z screen -t 'ROOT' su
bind L screen -t 'LOGFILE' sudo /usr/bin/tail -f /var/log/messages
#
bindkey -k F1 prev
#
bindkey -k F2 next
You can copy and paste this in a ".screenrc" file and safe it in your home directory. The program will find it automatically. You are now ready for the next step.
wpeeters@kubuntu:~$ ls -la .screenrc
-rw-r--r-- 1 wpeeters wpeeters 2867 2007-11-10 15:26 .screenrc
wpeeters@kubuntu:~$
1.3 First steps with screen
If we start screen with this configuration file, it looks a bit nicer. After the start we see one session "*0 bash" on the bottom. Screen is made to arrange more than one sessions. (with just one session, screen would be useless!). Screen uses "Ctrl-A" as a escape key for entering commands. Every command starts with Ctrl-A followed by other key sequences. To make a new session we type "Ctrl-A" followed by "c". To do this, you type in "Ctrl-A", release all keys and then type the character "c".
The following table shows a few (not all of them) of the interesting key bindings which I use the most:
| command | Function | Explication |
| C-a 0 | select 0 | Selects screen 0 |
| C-a 1 | select 1 | Selects screen 1 |
| C-a n | select n | Selects screen n |
| C-a 9 | select 9 | Selects screen 9 |
| C-a A | title | Allow the user to enter a name |
| for the current window. | ||
| C-a c | screen | Create a new window with a shell |
| and switch to that window. | ||
| C-a C | clear | Clear the screen. |
| C-a d | ||
| C-a C-d | detach | Detach screen from this terminal. |
| C-a D D | pow detach | Detach and logout. |
| C-a space | ||
| C-a n | ||
| C-a C-n | next | Switch to the next window. |
| C-a N | number | Show the number (and title) |
| of the current window. | ||
| C-a backspace | ||
| C-a h | prev | |
| C-a p | ||
| C-a C-p | Switch to the previous window | |
| (opposite of C-a n). | ||
| C-a ? | help | Show key bindings. |
| C-a C- | quit | Kill all windows and terminate screen. |
| C-a : | colon | Enter command line mode. |
| C-a [ | ||
| C-a C-[ | ||
| C-a esc | copy | Enter copy/scrollback mode. |
| C-a ] | paste | Write the contents of the paste buffer to the |
| stdin queue of the current window. | ||
| C-a R | attach | Re-attach to a running session and if none |
| exists create one | ||
| C-a R | attach | Re-attach to a running session and if none |
| tell me without creating a session. | ||
| C-a x | multi user | Attach to a running session for |
| for looking at it in multi screen mode. | ||
| You can use it for attaching to! |
1.4 A little exercise
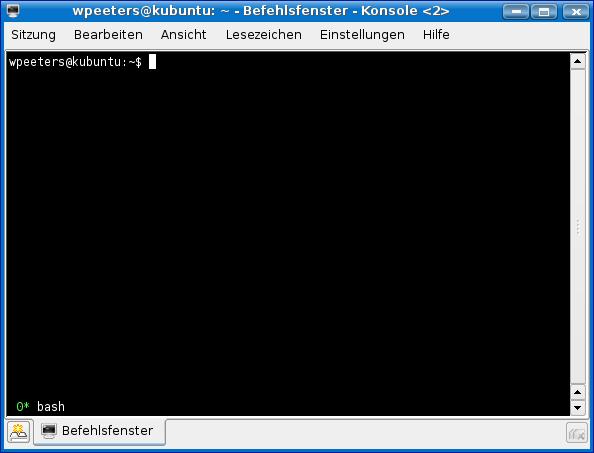
In this little exercise you start screen from the commandline. Here you see a startup session.
This might be boring. Therefore I took the following screenshot which is a bit more interesting.
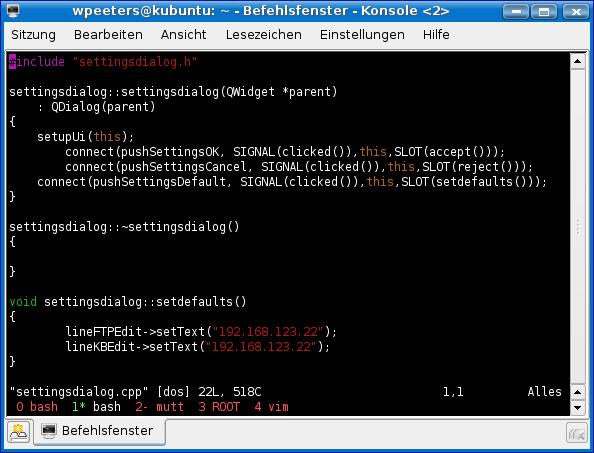
Here you see 5 sessions. Session 1 is active at the moment. The Session are "0 bash 1* bash 2- mutt 3 ROOT 4 vim". These sessions can run on different systems. In the case of rootserver administration, the screen session normally runs on the rootserver.
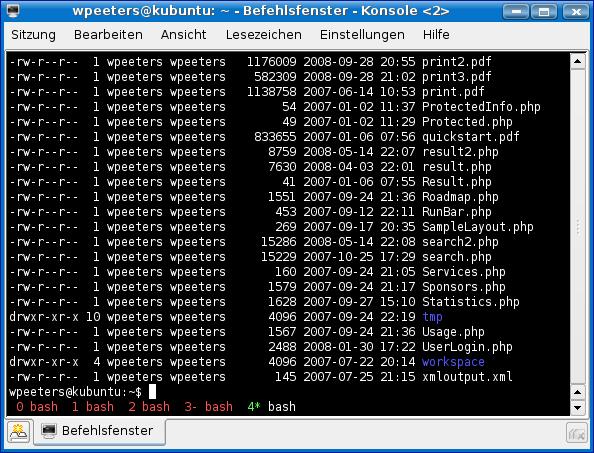
Please try out the following. Start Screen, it should look like the startup session above and then type Ctrl-A c to create a new session. Do this until you have 5 sessions. on the last session you type ls -la followed by <enter>. You screen should look like the following.
Cycle through your windows with Ctrl-A n for next and Ctrl-A p for previous. Cycle till you get your session with the ls -la text on it. Jump immediately to session 2 with Ctrl-A 2. If you think you could do this with diffent session form the local system, I agree. Now you should just close the terminal window (yes, without closing the sessions first) and reopen a new terminal. You type the command "screen -list". You should see a detached session. If you compiled some sources in one of the sessions, the compilation goes on. Your monitoring session will not sleep either. You can detach the hard way (which you did) or properly with the detach command Ctrl-A d. You can Re-attach with the "screen -R" command.
This exercise already explained the basic usage of screen but we have still more to offer.
1.5 Attach and detach
One very interesting feature of screen is the possibility to detach from a session and to attach it again later. The process is not effected in that time and stays running. This makes is ideal for long running jobs. To detach a screen we use C-a - d. To see if you still have a session running you can use screen -ls. The reattachment is done with screen -R.
1.6 Split screen
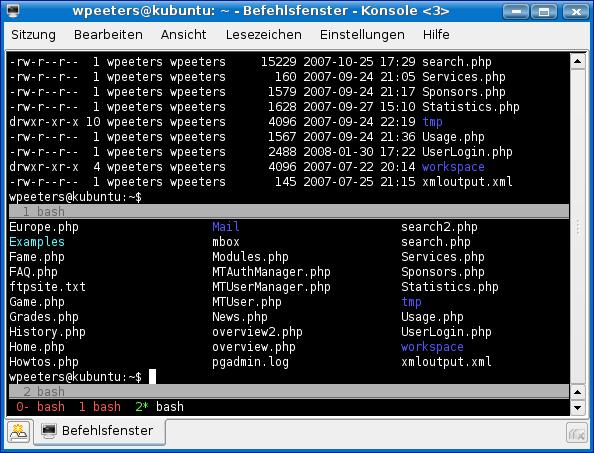
I never use this feature but I know people who always split their screen sessions. You split your session with Ctrl-A S (capital S!) You have to use Ctrl-A <Tab> to enter the split window. You can even resize those regions. An example can be seen in the following screenshot.
1.7 Security
Now you are telling me that you use screen for administration of rootservers! What happens when somebody can find your session unattended? Well in the case I leave my system unattended, I use Ctrl-x to lock my screen sessions. Only my password can unlock it again.
1.8 Copy and paste
I just use my mouse to select some text and use both left and right buttons to insert into my commands. You can switch between sessions and paste and copy in other sessions.
1.9 Troubleshooting
When your screen seems to be frozen you probably touched the Ctrl-a s (little s here) To unfreeze the window you can use Ctrl-a q.
A remote session is sometimes not properly detached. (e.g. your commection died) You still see this session as attached when listing them. To attach to this session you can use its name or tell Screen to detach it first using "screen -DR". (detach and re-attach) This is easier then typing "screen -r 23383.pts-5.kubuntu".
If you cannot attach in multi user mode, it might be disabled by your OS. (Gentoo used to disable this by default)
1.10 More information
For more information you can look at the man page of screen. We did not cover the configuration file, the monitoring features, Keyboard shortcuts, and more features. I have to admit that with the subset of functionality described in this article, I am doing my job for years.
Disclaimer:
The information provided in this document is intended for your information only. Lubby makes no claims to the validity of this information. Use of this information is at own risk!About the Author
Author: Wim Peeters - Keskon GmbH & Co. KG
Wim Peeters is electronics engineer with an additional master in IT and over 30 years of experience, including time spent in support, development, consulting, training and database administration. Wim has worked with SQL Server since version 6.5. He has developed in C/C++, Java and C# on Windows and Linux. He writes knowledge base articles to solve IT problems and publishes them on the Lubby Knowledge Platform.
Latest update: 27.08.2022 | Comment: